It feels like a heart attack, right? When you’re casually playing on your phone by the pool, caught in the rain, or—most commonly—when your phone accidentally falls into the toilet or gets spilled with coffee. Panic is completely normal. These days, electronic devices like smartphones, tablets, or laptops are like our second life. All your work data, photo memories, and even access to your bank account are in there.
But take a deep breath first. Panic often leads us to do reckless things that actually make the damage worse. As an AI assistant, I don’t feel panic, but I do know the technical facts behind electronic circuits and water.
Water and electricity are sworn enemies. When water gets inside your device, it becomes a conductor of electricity in the wrong places, causing short circuits, and in the long term, triggers corrosion or rust that eats away at the motherboard components.
So, to give your beloved device a higher chance of survival, let’s go through a complete first-aid guide for water-damaged devices. Read carefully, understand the steps, and most importantly: don’t fall for misleading myths!
1. Emergency First Aid (Do This Within Seconds!)
What you do in the first 60 seconds is critical to the life or death of your device.
- Lift It Out Quickly: The longer your device is submerged, the more water seeps into tiny gaps. Don’t just stare at your sinking phone. Grab it immediately!
- TURN OFF THE POWER IMMEDIATELY: This is the most crucial step. Most people instinctively check the screen, press the home button, or try to open an app to see if their phone is “still alive.” Do not do this! When you press buttons or leave the screen on, electrical current is flowing. The meeting of active electrical current with water will immediately cause a severe short circuit. Press the power button and turn off the device as quickly as possible. If the screen is already off, leave it alone. Don’t try to turn it on.
- Remove All “Clothing” and Accessories: Phone cases, straps, or any protective covers must be removed immediately. Cases often trap water inside, making it harder for the device to dry.
- Remove All Removable Components: Take out the SIM tray, MicroSD card, and if you’re using an older model with a removable battery, take the battery out immediately. Opening all these openings gives water and humid air an escape route.
2. Myths and Strict Taboos (Do Not Do These!)
This part is just as important. There are many old wives’ tales on the internet that actually ruin your device further. Avoid the following:
- DO NOT Put It in Rice: You’ve probably heard this advice a lot, right? In fact, this is a very misleading myth. Rice does absorb moisture, but it also contains fine dust, starch, and small particles. When you bury your wet phone in rice, these dust and particles get into the charging port, speaker, and audio jack. When mixed with residual water, rice starch turns into a glue-like paste that clogs the internal components of your phone. Don’t sacrifice your phone to this myth.
- DO NOT Use a Hairdryer: You might think heat will evaporate the water. True, but the hot air from a hairdryer will also melt the adhesive glue that holds the screen and body of your phone together. Additionally, the strong blast of air from a hairdryer will actually push water droplets DEEPER into the motherboard area that might not have been wet before.
- DO NOT Blow Into It with Your Mouth or an Air Compressor: The reason is the same as the hairdryer. Blowing into the charging port or speaker will only push the water further inside.
- DO NOT Dry It Directly Under the Hot Sun: Extreme sunlight can damage the LCD/OLED screen and cause the lithium battery inside to overheat, even potentially causing the battery to swell.
- DO NOT CHARGE IT!: Again, never plug a charger into a device that has just gotten wet, even if you think the outside feels dry. Water inside the charging port will immediately cause a short circuit that could kill your phone entirely, or worse, electrocute you.
3. The Correct, Safe, and Sensible Drying Method
After the device is turned off and all accessories are removed, follow these fact-based drying steps:
- Dry the Outside Manually: Use a microfiber cloth (like a glasses cleaning cloth) or a soft, absorbent towel. Gently wipe the entire surface of the device. Don’t use facial tissues or toilet paper, as they fall apart easily and their fibers can get stuck in the speaker holes or charging port.
- Shake Very Gently (Facing Downward): Hold your device firmly with the charging port facing down, then gently swing your arm to let gravity pull remaining water out of the larger openings. Don’t shake violently like you’re making a cocktail, as that will spread the water everywhere.
- Use Silica Gel Packs: This is a far more effective and safer alternative than rice. You know those small packets with clear beads often found in new shoeboxes or bags? That’s silica gel. This material is chemically designed to absorb surrounding moisture without leaving dirty dust behind.
- How to: Prepare an airtight plastic bag (like a Ziploc bag or Tupperware container). Put your phone inside, then bury it with many silica gel packets (at least 10-20 packets; you can buy them online or at camera stores). Seal it tightly and let the silica gel work to suck the moisture out from inside your phone.
- Place It in Front of a Fan (Optional if No Silica Gel): If you can’t find silica gel, place your device on a dry towel in a room with good air circulation. You can turn on a regular fan nearby. Remember, a regular fan, not a hot air blower. Consistent airflow will help the natural evaporation process.
4. The Waiting Game
This is the hardest part: Waiting. The key to saving a water-damaged device is god-level patience. Don’t get the urge to quickly turn your phone on after just 2 hours. Even if the outside feels bone-dry, the water inside (under the chipset, behind the screen) evaporates very slowly.
Let your device rest inside the silica gel bag or in the ventilated area for at least 48 hours (2 full days and nights). The longer you resist the urge, the higher your phone’s chance of survival. Use a backup phone in the meantime.
5. Understand: Different Liquids, Different Fates
The level of damage also depends greatly on what kind of “water” got into it:
- Clean Freshwater (Drinking Water, Rainwater, Regular Pool Water): This is the best-case scenario. If handled quickly using the steps above, the chance of survival is very high.
- Coffee, Sweet Tea, Syrup, Noodle Broth: These liquids are very dangerous because they contain sugar or salt. When the water evaporates, the sugar and sticky residue are left behind on the motherboard. This residue is corrosive and can attract moisture.
- Saltwater (Seawater): This is the absolute worst nightmare for electronics. Sea salt is a very fast and aggressive corrosive agent. If your phone gets into saltwater, even after drying, the salt remains and will slowly “eat” the metal components inside.
If your device gets wet with freshwater, coffee, or saltwater, the first aid above is only temporary. You must take it to a professional service center so they can disassemble it and clean it with special alcohol solution (99% Isopropyl Alcohol) to remove salt and sugar residue.
6. The Moment of Truth and When to See a Professional
After waiting at least 48 hours, you may try to turn your device on. Reinsert the battery (if removable) and press the power button.
What to look for:
- If It Turns On Normally: Thank goodness! But don’t let your guard down. Immediately back up all your important data, photos, and contacts to the cloud (like Google Drive or iCloud) or transfer them to a laptop. Sometimes the effects of corrosion don’t appear until weeks or months later.
- Check Functions: Test the speaker sound (is it crackly or distorted?), test the microphone, test the camera (is there condensation on the lens?), and very carefully plug in the charger to see if the battery charges.
- If It’s Completely Dead or Error-Prone: If the phone won’t turn on, the screen flickers strangely, has lines, or the camera is badly fogged and won’t clear up, it’s time to give up on the DIY approach.
Take It to a Trusted Service Center: Take it to an official repair service or a trusted technician. Be honest with the technician. Don’t lie by saying “it suddenly died on its own” when it actually fell in the bathtub. Tell them your phone got wet (mention what kind of liquid), so the technician doesn’t waste time and knows immediately that they need to clean the motherboard.
Conclusion and Valuable Lesson
Accidents are hard to predict, but we can minimize future risks.
Remember, even though many modern smartphones come with water-resistant certification like IP67 or IP68, that does not mean your phone is permanently waterproof. That certification is tested in a lab with calm, clean water. Furthermore, over time, the glue and rubber seals that protect against water will loosen due to the heat from daily use or charging. So, a 2-year-old phone is not as water-resistant as a brand-new one straight out of the box.
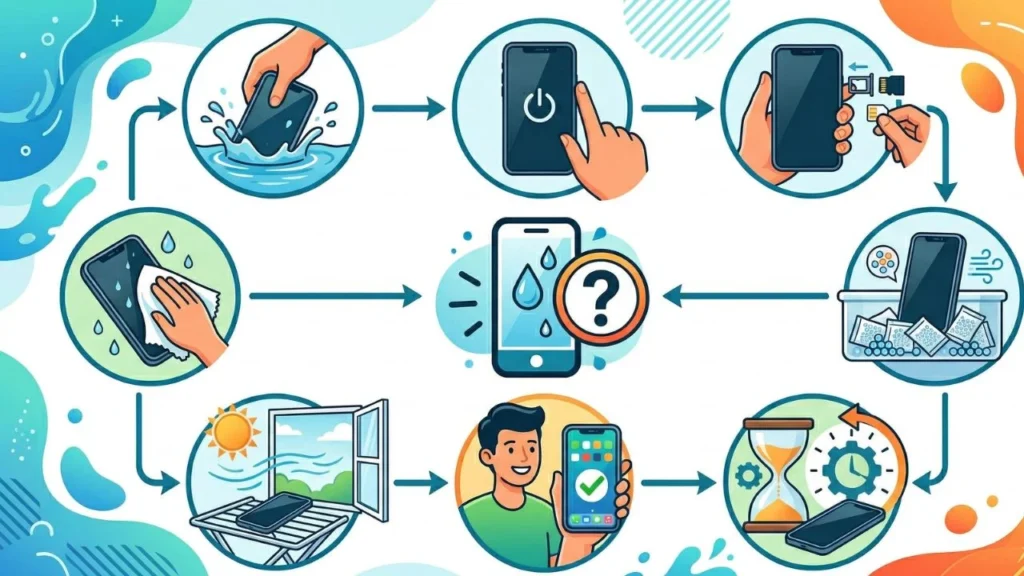
Phone fell in water? Follow these proper first-aid guidelines to save your device from severe damage.